Wednesday 1 February 2012

 Happy New Year!  This is our first update for quite some time due to limited daylight hours and a fabulous holiday in Cuba over Christmas and the New Year.

We are now planning our first trips away for 2012, the first one being Dubfreeze in February.

 We are just about ready - curtains and bed cushions are fitted but still need some finishing touches; the gas, water and electrics are all operational, so we have a functional camper which still needs work but we can start to enjoy it over the coming months.


The van is a Long Wheelbase model, only 40cm longer than the SWB version and the extra length makes the inside living space seem positively cavernous compared to our old Bay.  However that additional 40cm means an 18 ft long vehicle and is all the difference between being able to judge distance easily and bumping your mum's neighbour's fence...sorry Pat!  So the first job of 2012, a reversing camera was called for.

The wiring was an absolute pain as I had to route it through the tailgate adjacent to the window and through the tailgate boot as shown in the picture.  A coat hanger was invaluable here in feeding the wires through the narrow space.


 The camera itself is fitted in place of one of the number plate lights meaning the horizontal position is almost central as seen in the picture.  It came with 5m long video cable which was just enough.

The camera and monitor are designed to be connected to the reversing light circuit which means the system only powers on when reverse gear is engaged.  The rest of the time the monitor's blue reflective surface works as a normal rear view mirror.  However, we found there to be two negatives - firstly our rear seating arrangement means half of the rear window is obscured, and secondly to be blunt the monitor's reflective surface is inadequate at night in comparison to a conventional mirror.

So I have also wired our camera system to an ignition live with a switch on the dashboard so it can be used as a rear view mirror on demand.

 One final thing to add about the system is that it incorporates gridlines as an overlay in order to help judge distance.  This seems a really useful feature but we still have to get used towhat each line represents in terms of distance.

A nice view of our untidy garage.


 Major progress last weekend with a pair of leather seats from a Saab 9-5, all the way from Weston-Super-Mare.  Saab seats are a popular choice for T4s and T5s as they are almost a straight swap for the VW ones.  So out came the double passenger seat and single driver's seat, to be replaced with two single seats meaning we can now walk through from the cab area to the rear.  The last thing anyone needs on a wet Sunday morning camping in Wales is having to leave the comfort and warmth of the van in the pouring rain to get into the driver's seat!


Our passenger seat is fitted on a swivel plate providing extra seating in the rear when camping, and the base is a really sturdy lockable safe.  We are really pleased with how comfortable the seats are


Plans for the coming month are to finish the lower cupboards, the awning rail, fit reversing sensors and test everything out at Dubfreeze to see what works well and whether we need to make any changes.  I am also building a "van-puter", comprising a cheap netbook purchased from eBay which had a broken screen and missing hard drive, connected to a ceiling mounted, flip-down monitor.  The plan is to add a decent sized SSD drive to store loads of films, and upload from our PCs to the van over the network.  Should be an interesting side project.

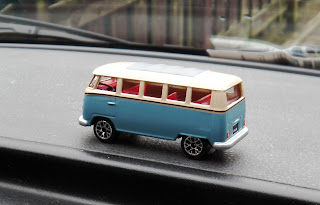
Finally a nostalglic touch, a model of a blue Splitty on the dash.


Wednesday 9 November 2011

Update for November

We continue to make progress in our conversion though the cold and dark evenings tend to restrict much in the way of after-work tinkering.  As the weather was lovely last Sunday we had a drive out to Chatsworth House where we had our first proper van-brewed cuppa, and then on to Bakwell where Harvey had a good run around chasing birds.

Split charge system finished, tested and working.  The picture is of the fused supply at the starter battery end.


Our combined sink, hob and grill is finally fitted!  It is a second hand unit purchased on eBay, we can't justify the £300+ prices for ther fancy new Smev jobs and specifically wanted one with a grill.  Building the aluminium grill housing from scratch and getting it to fit was a real pain.


The sink unit was originally fitted in a caravan and has a lip around the edge where it overlapped the caravan worktop, so in our installation it sits about 1cm higher than the work surface.  We put a lot of thought into how to overcome this obstacle.  The sink is fixed and screwed onto small battens that sit around the inside lip and which are themselves stuck and screwed down to the work surface, with a tile edging strip stuck down around the sink using Sikaflex.

The picture shows the gas supply pipe taped to the back of the cupboard, this is a temporary measure!  Also there is a 38mm gas drop-out hole drilled through the floor, which will eventually be covered by a small plastic grill cover, and on the right at floor level the leisure battery (110Ah Lucas sealed, deep cycle), self sensing split-charge relay, 12v isolator switch and mains battery charger.


Back to the sink/hob and grill combo.  I was quite concerned because the gas supply pipe sits inside the grill housing.  The unit was obviously built this way deliberately, so it is not a safety risk and having checked forums online it seems that it is quite a common setup.  As an additional safety measure and just to set my mind at rest I intend to rivet another piece of aluminium between it and the burners to deflect any heat from the supply pipe.  Gas connection was tested and adjusted and it does not leak however I will check it regularly for leaks until the gas installation is finished.


23mm waste which exits the van through another hole in the floor.


Finally the rear of the van taking shape.  Bed is panelled now but I think I will carpet it at some point.  Rear most cupboards will have sliding doors for ease of access when the bed is down.  Rear quarter shows a single mains socket, a switched voltmeter which indicates our leisure battery condition, and a 12v cigarette lighter socket.  Some trim and carpteting to be tidied up here and around the window.


That's all for now, next up we have begun to work on cupboard doors, the seat/bed upholstery is just about done and started to think about high level cupboard units and how to contstruct the headliner.

Tuesday 11 October 2011

Almost Done!

Well, not quite but it feels like we have made massive progress in just six weeks.  Almost mid October and thanks to the mild weather up until recently, the build has progressed well.  We will have a functional - though by no means finished - camper before long.  The carpeting and wiring are more or less complete, just need to buy some more LED lights, voltage regulators and a leisure battery among other things.


Mains
Consumer Unit is a domestic garage unit which will feed three single sockets and two doubles.  Wiring connected via a 16 amp RCD which is greater than most campsite supplies and therefore more than adequate for our needs.  Unfortunately I used domestic solid core cable before reading that solid cable can fatigue and break in a mobile environment, and that stranded cable must be used for vehicle wiring.  Well it is done now, and cable tied at regular intervals so I don't envisage fatigue being an issue however I am prepared to replace one or two cable runs over the years if necessary.

12v
Fuse box from eBay, every appliance from lighting units, 12v socket, voltmeter and water pump will be individually fused.  The leisure battery will be installed just forward of the driver's side wheel arch. Heavy duty 12v switch installed, along with a 140 amp self-switching relay to control the split charging system.  This setup allows the vehicle alternator to charge the leisure battery while the engine is running, but isolates the starter battery when parked up meaning our 12v appliances will not drain the vehicle's starter battery.  Cable run from starter to leisure battery is fused at each end .

Awning
 Jude's diligent EBay searching paid off and we now have a lovely 2011 Victor  Khyam awning, I liked it so much I bought the company.  It really is a great piece of kit and erects in seconds I can see why people rave over these awnings.


We have yet to fit an awning rail to the van and have a delivery of aluminium "J Rail" from Bluebird Customs in the post.   Though I'm not keen on the idea of drilling holes in our roof, and have read that top quality adhesive (the sort they bond windows in with) is sufficient, I think we'll probably go for overkill and use self-tappers AND adhesive.

Stereo
I removed the double-DIN VW Stereo and replaced it with a Sony unit, very similar to the one in our Golf but with Bluetooth functionality for streaming audio files from our phones.  I also replaced a piece of trim where the previous owner had glued something to the dash.  Before and after pics:


Units
We made a start on the units building a framework out of 33mm square battens.  The first unit will be for the fridge, but since we don't yet know what model we will be getting, the side of this panel is open for now.  The first three cupboards will have a single 40mm door each.  Those further back in the van will have two doors one at floor level and one above bed/seat level so that we still have access to the units when the bed is down. We toyed with the idea of building a small full-height cupboard at the driver's side rear quarter like most conversions of this type have, but we both like the open layout.  Also as we spent so much having those windows fitted that it makes no sense covering them up even a little bit.  I don't want our "view" from the seating position to be a cupboard door.


Worktop
We bought a 2.2m length of worktop from Ikea last weekend and after making several templates it is now fitted, glued and screwed down.  It is really cheap stuff but a campervan kitchen won't get as much use as a domestic one so there didn't seem much point in spending a lot on hard wearing worktop.  We did consider making use of a piece of beech worktop left over from having the kitchen done last year, but it weighs a TON.


Next stage of the project is to complete the unit dividers and shelves as well as ply-lining the bed and making a start on the upholstery.

Monday 26 September 2011

Glazing Ahead

A major update this week as we had the windows and bed fitted.  Thanks to T4 Transformations in Wakefield who fitted four side and a tailgate window all in a limo tint, they are fixed windows except the one behind the driver's seat which slides open.


Also thanks to JDS Metaltech in Sheffield who fitted one of their Rock and Roll style beds.  Their space saving design means that when the bed is in an upright sofa configuration, it sits further back than most units providing more living space in the van.  In fact you are sat virtually up against the back door.


We had a mains hookup inlet fitted too, visible on the offside behind the rear wheel.   In black so as to be a bit less conspicuous.  I thought that while T4 were having fun cutting holes in our van they might as well install one of these to save me the hassle.  I will have to wire it up to the consumer unit at some stage, at the moment it simply runs a length of three core cable inside the van.


We bought a combined hob, grill and sink unit from EBay which should arrive this week.  We have more or less finalised our water supply arrangements which will be a cheap submersible pump inside a portable 25 litre water container, all housed in the rear cupboards and accessed from the tailgate.  I did consider a fixed tank or even an under chassis unit but freezing and contamination are a concern.  The advantage of a portable container is that you don't have to drive the van to the water supply in order to fill it up!

I have been reading up about fridges, as we need to have a fridge or at least know the dimensions of a likely modelbefore building our wall units.  The common three way (12v/240v/gas) caravan fridges require vent and flue holes cutting in the side of the van if they are to be used on gas, I'm not enthusiastic about having more holes cut in the van and even less keen on the safety implications of having gas appliances running all day.  The Calor bottle supplying our double hob and grill will be switched off at the valve when not in use, and will have a drop-out hole in the floor in case of leaks.  Ultimately I want to buy one of the new compressor fridges which run from the leisure battery and are extremely efficient consuming around 1 Ah, however they are ridiculously expensive at over £400 new, I wouldn't pay that much for a domestic fridge never mind one for a camper van!  So for the moment we will probably build the units to fit either a Waeco CR50 or a Vitrifrigo fridge to be bought at a future date, and until then use our cheapo Asda portable unit and do without when not on electric hookup.

Insulation is finished and carpet lining well under way.  Mains and lighting cable routing is done.  Note the jazzy deck chair fabric on our sliding door!

We should hopefully have another update next week with some progress constructing the furniture.

Saturday 17 September 2011

Vanfest

Thanks to some last minute negotiations on Jude's part we managed to get some tickets to Vanfest last weekend, this was our first weekend "camping" in the van.  The living accommodation was a bit sparse to say the least, comprising a mattress in the back and a small camping stove but we had a good time at Vanfest and I'm sure that our facilities will be much better on our next weekend away.

Anyway we picked up some bargains including a roll end of Lino, 4 slightly bent pieces of Silent Gliss curtain rail and an aluminium folding table for the awning - the awning that we don't have yet, just one of many things still on the shopping list.  Oh, and we bought a bandana for Harvey which says "Air cooled dog" and very cool he looks too!


Most useful though was having the opportunity to view the professional conversions, getting a close look at how they are constructed and we came away with plenty of ideas and lots of pictures of the insides of cupboards!

On Monday we will be taking the van to T4 Transformations in Wakefield to have five windows fitted, then on to JDS Metaltech in Sheffield who will be fitting the Rock and Roll bed.  I am not brave enough to cut holes in the van myself so it makes sense to have the windows professionally fitted, and the bed comes with free fitting anyway!  We are really looking forward to seeing the van take shape, in particular once the bed is fixed in place we will know exactly what space we have to work with.

In preparation for all this work, this week we have been preparing the van, in particular making sure the floor is solid and level before the bed goes down.

The insides of the body panels got a treatment of Waxoyl with underseal applied to the upper and more accessible areas.  Then a layer of loft insulation was added, this is made from recycled plastic bottles.  And to complete the sandwich a layer of airtec foil insulation on top.  The roof panels have also now had a second layer of airtec.


The driver's side rear panel has not been insulated yet as this is where the mains inlet will be so there is some wiring to be installed there yet.  I have also made a start on routing mains and 12v cables including a 10mm cable from the starter battery through the bulkhead and to where the relay and leisure battery will be.

The Lino was a bargain at Vanfest, a 3m x 2m piece reduced from £45 to £20 on the Sunday when everyone was packing up.  I am impressed with the quality, it is really heavy duty stuff but very tough to cut as a result.


Finally a rear view mirror from a Passat and an interior light unit from a Golf, £6 and £10 from the local scrappy.

Wednesday 7 September 2011

Starting on the Insulation

Remaining pieces of bulkhead frame removed at the weekend, these had to be drilled out and the bottom piece cut out with an angle grinder.  Jude doesn't trust me with dangerous tools because I'm such a clumsy oaf, but we counted the fingers out and we counted them all back in again and I'm happy to confirm that all digits are accounted for.


Our eBay purchases have started to arrive daily now, from seat fabric to fuse box and a 140 amp split charge relay.  We also bought some funky multi coloured LED strip lights from B&Q, marked as "low voltage" and as expected they run on 12 volts without the mains transformer.


Tonight we made a start on the insulation.  The plan is to insulate and carpet line at least the passenger side rear quarter before the bed goes down, as fitting insulation and lining with the bed in place would be awkward.


One layer of Airtec foil lined bubble wrap insulation stuff on the floor and we then screwed the floor ply back down.  A section along the driver's side wall will have to be removed at some point to drill holes in the floor for waste water, 10mm feed from starter battery to leisure battery, and the gas drop-out.


Flashing tape to deaden vibrations followed by the first layer of Airtec on the ceiling, the plan is to add another layer and then construct a lightweight foamex board headliner.

Saturday 3 September 2011

Now the Hard Work Begins


We drove over to Stockport today to pick the van up and brought it back to Sheffield over the Woodhead Pass.  I was pleasantly surprised at how responsive it is, hit 80 at one stretch on the M1 without even realising it.  Anyway we got home without a hitch, even managing to find the fuel filler and remember that it uses diesel not unleaded!


Our drive is quite narrow, but I managed to reverse it down towards the garage without ripping the wing mirrors off.  Job done.  The twin passenger seats may have to be removed for easy access between cab and rear.  I have read that 2001-2006 Mini Cooper seats are almost a perfect fit on the VW seat frame.


The first job was to remove the factory fitted bulkhead, that was easy enough but the mounting frame is welded to the floor and bolted to the sides of the cab near to the seat belt mounts.  We will take the angle grinder to these tomorrow.  Note the ingenious use of sponges to prevent the tailgate hitting the garage door frame!


Jude has been researching cabinet construction and seat materials, apparently we are to have a Suffolk beach hut theme which should be unique and look great.  We had toyed with the idea of doing an "Ikea Conversion" but more or less shelved that one now in favour of building a wooden framework which will allow a more flexible design.


Harvey helping


Bulkhead and all ply lining removed, and floor cleaned up nicely.  That's all for today.